Monday, 15 November 2010

Making the tongue and teeth

Tongue and teeth

teeth finished with latex and acrylic


Plastazote cut into teeth with latex skin


Tongue in position within the mask

These elements are made from a sheet of flexible foam called Plastazote. This foam is most commonly used in packaging, with the object sitting in a shape cut to fit it's silhouette. This material is lightweight, water resistant and available in various thicknesses. The foam availible in the store cupboard is 0.6mm thick coloured Black. For my tester piece, I was able to use a thicker sheet from which a rounded tooth could be cut from with a scalpel. However, when I was ready to make my teeth only the thinner sheet of foam was available. To reduce costs, I simply stuck two sheets of the plastazote together using contact adhesive. Once the glue had set, I could then cut a tooth shape from the foam. Following my reference imagery, I cut an array of different tooth sizes that are exaggerated from the relative proportions found in real crocodiles. To further bond the two sides of the tooth together, the foam was then dipped in liquid latex to give a smooth skin for which to paint on. The teeth had to be repeatedly coated as the latex tends to drip down to the base of the tooth. This process proved rather time consuming, especially as I then had to cut out bubbles and large imperfections in the cured latex. I used the same method to make the tongue, cutting a slit down the centre so that it fit into to jaw of the helmet. Each flap at the back of the tongue glues into the chin while the tongue is secured down at its tip where it touches the inside mouth.
When painting the teeth, I started with a base coat of latex mixed with white pigment. I was hoping that this would provide further coverage of the Plastazote's surface. I also found that small holes in the latex skin could be filled with thick, white acrylic paint.

Tuesday, 9 November 2010

Costume update

Gold print belt
Back view

Frontal view

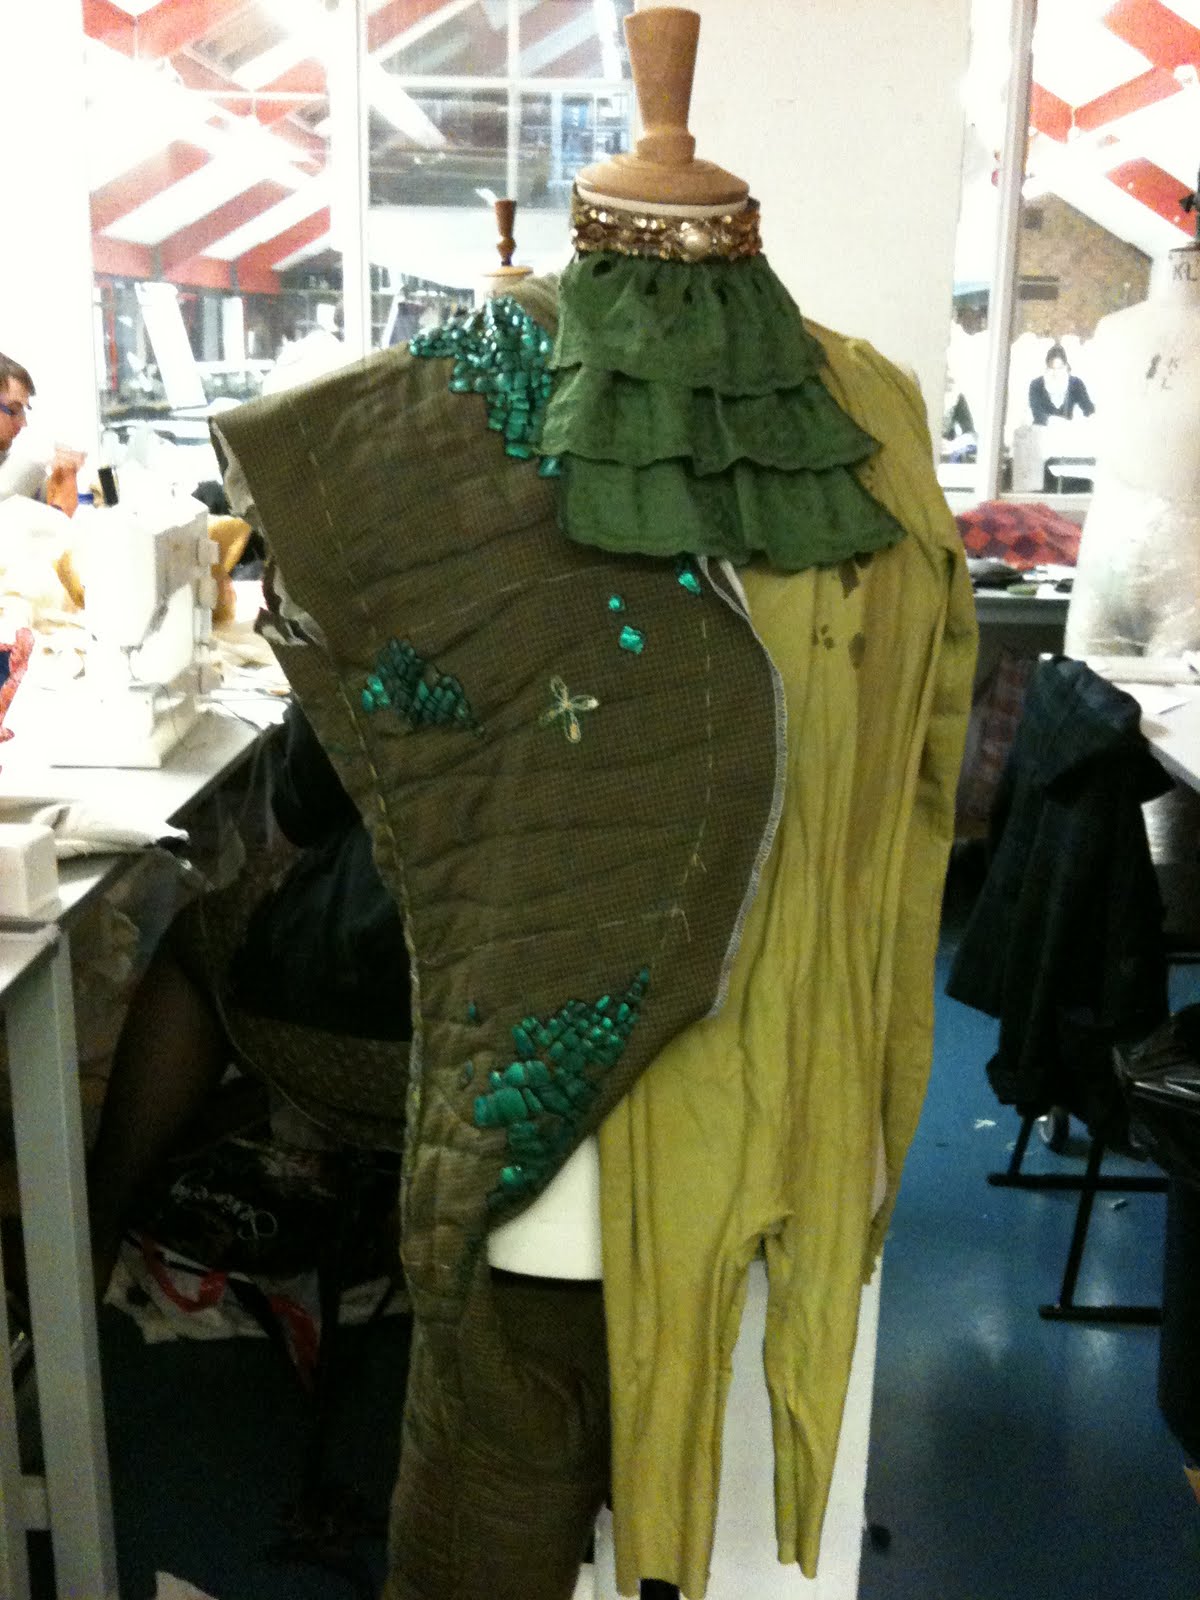
These are some quick shots I took as Debbie's costume was progressing. From talking with her I was able to see how the costume has changed from the design to include much warmer, Golden tones in it's colour scheme. I have also noticed how she has added a padded fabric tale in addition to the ruffles that will fan out at the hips. She has used a quilted texture in the waistcoat to simulate scales, whilst the metallic fabric is mainly reserved for the trousers and patches of detail. The costume strikes me as rather Punk in style, thrown together using mismatching fabrics with belts to be strapped across the chest. Some sections of the costume are rather refined, such as the neck ruffle and screen printed scales that cover the hands and body suit. As my head piece is rather large, I should be careful to try and not obscure the costume, particularly the broach at the front of the choker.
Though we are working from the same design, there are inevitable differences in our approach. My head is becoming more sinister and cartoonist in response to the client's feedback, while I feel that the costume appears to reference the Aristocracy as it's main inspiration. Merging these two styles may prove to produce the desired outcome, though only the designer can really know if we have re-created his idea correctly.

Fixing onto the helmet and applying a skin

latex finish
Guide for webbing detail

Filler covers the helmet and provides a surface for the webbing detail to be carved into
To prepare the helmet for fixing the jaws in place, I keyed its black paint finish and the inside of my foam model with a scalpel, so that the contact adhesive would sit into these indentations. It was also important to key the sides of the helmet for the car body filler parts at the sides of the mouth. The filler provides a thin, strong surface for me to carve in detail, whilst providing additional support by filling any gaps between the jaws and the helmet. Both jaws were positioned in place by standing back and alligning them with a ruler. The contact adhesive was allowed to air dry for about ten minuets onec out of the tin before being applied to both surfaces. I left this for one hour to dry.
Once I was satisfied with the surafce of the blue foam, I could then sponge and paint on several coats of liquid latex, approaching the head at different angles throughout the day to ensure even coverage. I took out two paint brushes and used cheap kitchen sponges as the latex destroys painting equiptment. I also wore protective gloves and clothing whilst doing this. Latex gives off an ammonia smell as it cures which is unpleasent but relativly harmless. Naturally, the latex has pooled and filled some spaces whilst any stray drips have created small bobbles on the foam's surface. I have cut out any gloops I feel to be a problem whilst leaving a few imperfections allows for a rougher, more realistic finish to the crocodile.

Monday, 8 November 2010

Experiementing with different finishes

PVA glue
Painted foil and clear cast resin

Tin foil and glue, with clear resin on top

During our mid-way tutorials, it was suggested to me to experiment with a foil and resin finish, to reinforce the blue foam and help to protect it from ware and tear during the two-month run of the pantomime. The foil is successful in creating a more textured, metallic finish but shows through once painted with acrylics. I predicted that the silver sheen of the foil would add a metallic finish to the paint, but it actually appears to dull it.
A hard shell sitting on top of the foam is also more likely to shatter once knocked. Foam coated in latex will become indented more easily, but this is less noticeable compared to a shattered affect in the paintwork. By keeping the finish fairly thin and elastic, it is more easy to patch up if damage does occur. Another finish I have trialed is PVA glue, to seal the foam before the latex is applied. Again, this creates a harder shell to the model but retracts from the foam's ability to spring back into place once knocked.

Filling, sanding and filling in the gaps in my designs

My workspace

Scales with filler
Reference image for under bottom jaw

Bottom jaw detailing

As I have been levelling out my scales, I have strayed from my photoshopped design whilst drawing reference from a vast number of crocodile photographs. This imagery has particularly helped me with the under section to the bottom jaw, as I have not drawn my designs to show this viewpoint. Whilst carving in detail, particularly around the eyes, I have use regular car body filler to reinforce and alter the form of the foam. I have also added fine filler between the scales, where the blue foam is flaking or has holes in it. By giving the head a smoother finish, I hope that fine detail such as the marks defining the gums will be more visible, as the model will require less coats of latex to fill in the faults.

Tuesday, 2 November 2010

Acrylic paint finish

Fabrics applied to costume

Metalic Goldy green and bronze


Matt, deep green finish


Metallic, turquoise and gold finish


I have trialed several paint effects in response to my sample fabrics. The material swatches vary between a matt, sea green and a bright, metallic turquoise. Having spoken with the costume student, I have added gold highlights to the peek of the scales. She has altered the original costume design to incorporate a dark red belly dancing skirt, with gold coins attached. To match her scale print fabric, the groves between the scales should be deep green to black, whilst the Goldy green I have mixed up on my third paint test matches the sea green, more tweedy fabric. I feel that my paint sample shown at the top does not work as there are too many, clearly defined tones that do not blend together. The metallic sample shown at the bottom is the most effective as I have started to blend the layers of green together using a sponge.

Carving out scales

Rough markings and areas of car body filler

Filed back and filled

scalpel groves beginning to be cut at an angle

Following my photoshopped design, I have started to carve in the scales that cover the top and bottom jaws. Firstly, I roughly marked their position with marker pen before re-tracing the lines with a scalpel. This process proves rather time consuming, though I feel that a hand made approach is the most suitable method to use due to the softness of the blue foam and abstract sizing and positioning of the scales. I am aware that carving too deeply between the scales distorts the original shape of the crocodile's features. Once the lines are cut, I have began to flatten out my indentations by carving a gentle angle around the boarder of each scale. I am also working back into the ridges with car body filler to give a clean finish when filed and sanded, whereas the blue foam has a tendency to flake in delicate areas. Fine body filler provides definition to the groves and also helps to smooth the sanded foam.